
Horse Riding Wear Supplier Guide to Quality Gear for Every Rider
2026-09-12
You’ve probably stood in front of a tack shop rack wondering why breeches that look great on the hanger pinch at the knee or lose their shape after one wash. As a horse riding wear supplier, OpeEquestrian knows quality gear is about more than a label—it’s about durable seams, smart fabrics, and a fit that moves with every stride. This guide cuts through the clutter to help every rider, from first lesson to Grand Prix, choose gear that works as hard as you do.
Breeches That Move When You Do—And Why That Matters
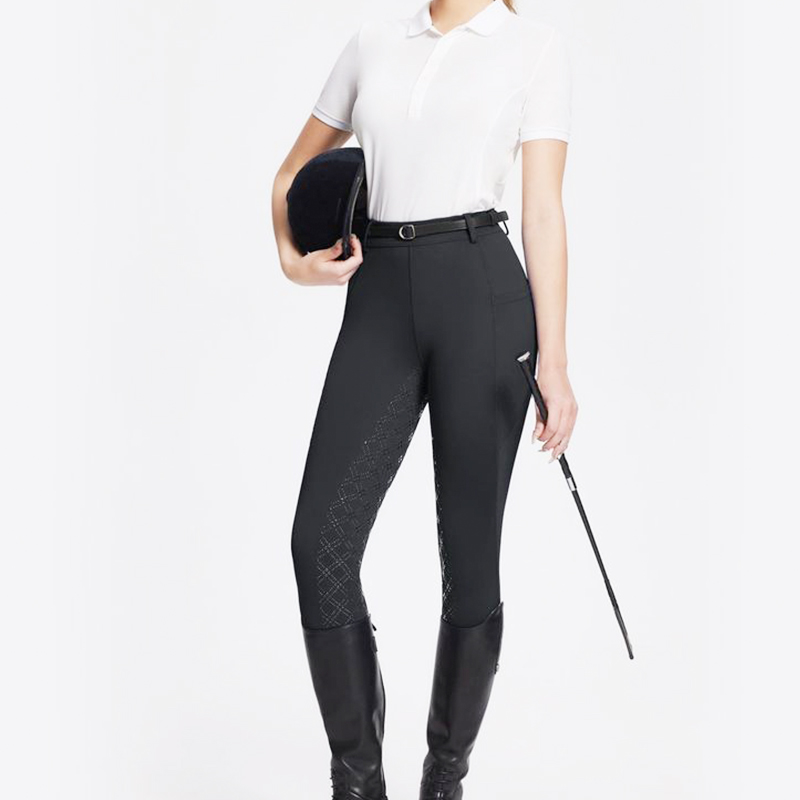
Most breeches fight you the moment you swing a leg over the saddle. The fabric pulls tight across the knee, the waistband digs in when you post, and after an hour there's a crease behind your thigh that feels like a rope burn. Breeches that actually move with you start with a four-way stretch knit that stretches and recovers in every direction, not just horizontally. The pattern matters just as much: a curved waistband that stays put when you lean forward, a gusseted crotch that removes the usual pull, and knee patches placed to follow your leg's natural bend rather than the seam line of a flat pattern. The result is a pair of breeches that feels less like clothing and more like a second skin—no tugging, no readjusting, no fighting the fabric mid-course.
Why that matters goes beyond comfort. In the saddle, your legs are a constant line of communication with the horse. If your breeches resist a slight calf shift or bunch up behind the knee, the aid gets muffled or delayed. You end up pressing harder or moving more than you should, which confuses the horse and tires you out. A breech that moves with you keeps the contact clean and immediate, so a whisper of leg stays a whisper. Over a long ride, that translates to a quieter position, less muscle fatigue, and a horse that stays more relaxed because your signals aren't noisy.
There's also the reality of barn life. You don't just sit in the saddle—you bend to pick hooves, climb fences, carry hay bales, and drive home. Breeches that move with you keep their shape through all of it, recovering at the knee and seat instead of bagging out. The fabric wicks sweat and dries fast, so you don't spend the afternoon damp. That kind of durability and freedom means one less thing to think about, whether you're schooling a green horse or just mucking stalls.
The Trail-Tested Fabric Guide Nobody Hands You at the Barn
Most barn advice stops at “cotton breathes” or “synthetics wick,” but trail hours expose the nuance. Canvas duck and 1000D nylon survive brush but turn into saunas on climbs. A better baseline is a tight-weave poly-cotton ripstop: it shrugs off thorns, dries faster than pure cotton, and doesn’t crinkle like technical shells after a creek crossing. Look for reinforced knees and seat if you actually ride, not just muck stalls.
Merino blends get hyped, and for good reason—odor control over multi-day rides is real. But pure merino pills under saddle friction. A 60/40 merino-to-nylon or polyester core-spun holds shape after thigh rub and doesn’t sag at the elbows. For outer layers, skip anything with a brushed inner face if you’re around hay and shavings; debris clings and makes you look like a lint roller test subject.
The real secret nobody at the barn mentions: check the seam interior. Flatlock seams on trail tights prevent the saddle-sore chafe that flat-felled seams cause after hour three. And avoid cotton webbing in waistbands—it absorbs horse sweat and digs in. A wide, matte elastic with silicone gripper stays put without turning breeches into sausage casing. If it feels stiff in the store, it’ll feel like sandpaper by mile eight.
Saddle Sore? Your Riding Tights Might Be the Culprit
Few things ruin a good ride faster than that deep, nagging ache in your seat bones or the raw friction along your inner thighs. While saddles and bike fit often take the blame, your riding tights could be silently sabotaging every pedal stroke. Cheap, poorly constructed tights with thick seams, abrasive fabrics, or a sagging chamois create pressure points and micro-chafing that only become obvious miles down the road. That discomfort isn't a sign of weakness—it's a material problem.
Look closely at the waistband and leg grippers. If they dig in, shift, or roll, they're forcing your body to compensate with every rotation. Tights that lack proper compression let the fabric bunch behind your knees or under your sit bones, turning a simple ride into a slow burn. Even high-end shorts fail when the chamois is too thick, too thin, or positioned wrong for your riding posture. The result is familiar: you finish a ride, and the first thing you want to peel off is the very thing that was supposed to protect you.
The good news? A better pair of tights changes everything. Look for flatlock seams, a chamois that matches your saddle style and ride length, and a fabric blend that wicks moisture without sliding. Your saddle soreness isn't a badge of toughness—it's feedback. Listen to it, and swap the culprit before your next long spin.
Layering for Early Morning Hacks Without Looking Like an Onion
There's a sweet spot between shivering at sunrise and sweating by mid-morning, and it rarely involves piling on three thick sweaters. The trick is to choose featherweight base layers that actually trap heat—merino wool or a brushed knit—and keep the outer shell minimal. A slim windbreaker over a thin thermal does more than a bulky hoodie, and it disappears into your bag once the sun climbs.
The real onion look comes from layers that all hit at the same length and puff out in different directions. Break that line by using a fitted vest or a cropped cardigan as your middle piece instead of an oversized flannel. This keeps your core warm while leaving your arms free to move, and the visual weight stays close to your body. Stick to tonal shades from base to shell so the layers read as one intentional outfit, not a random stack.
Pay attention to the small stuff—cuffs, collars, and hems. If they're all fighting for space at your wrists or waist, you'll look rumpled before you've even finished your first coffee. A packable down liner or thin fleece works as a middle layer without creating lumps under a jacket. And if the morning chill lingers, a scarf or beanie adjusts your temperature far more gracefully than adding another shirt.
Helmet Fit Tweaks That Take Less Than a Minute
Most riders overlook the two little straps that sit just below each ear. If the Y-junction doesn’t line up with the soft spot right under your earlobe, the helmet will either rock forward under braking or push back at speed. Slide the junction up or down until the chinstrap hugs your jawline without pinching—usually a three-second fix that stops the lid from shifting when you turn your head.
Another quick win is to loosen the retention dial, press the helmet down until it touches the top of your head, then tighten the dial only until the pads make even contact around your skull. If you feel a hot spot at the forehead, nudge the internal padding forward a few millimeters; if there’s a gap at the temples, swap in the thicker cheek pads that came in the box. Done right, the helmet should stay put when you yawn but not squeeze your temples.
Boot Soles That Grip the Stirrup, Not the Mud
A sole that actually works in the saddle starts with a simple contradiction: enough texture to hold a smooth iron bar, yet nothing that turns into a clay brick the moment you step into wet ground. The trick is in the tread layout. Instead of deep, aggressive lugs that pack full of soil, the pattern uses shallow, tightly spaced ridges at the toe and heel. These bite into the stirrup tread without creating pockets for mud to collect.
The center of the sole stays slightly recessed, which does two jobs. It keeps your weight over the stirrup bar where pressure should be, and it allows muck to squeeze outward rather than building up underfoot. The edges of the sole are cut at a gentle angle, not a sharp lip. That angled shoulder gives the stirrup a clean shelf to press against, so your foot doesn't skate forward or sideways, even after a long stretch of posting trot.
Material matters just as much as shape. A medium-hardness rubber compound resists abrasion from the stirrup's metal surface but still flexes enough to shed dried mud when you flex your foot. During a dismount in thick pasture, the sole self-cleans with a couple of hard steps on grass or pavement. No scraping, no clogged treads. Just a boot that stays connected to the horse, not to the ground.
FAQ
Focus on stitching strength at stress points like inner knees and seat, the weight and finish of zippers, and whether the supplier offers replacement parts. Ask about fabric blends instead of just brand names—many durable riding tights use a nylon-spandex mix with reinforced panels. A supplier that openly shares material specs and care requirements is usually more trustworthy than one that only mentions style.
Look for detailed size charts that include waist, hip, thigh, and inseam measurements, not just S/M/L. Some suppliers provide fit notes like 'runs large through the seat' or 'designed for taller riders.' Better ones offer free exchanges or virtual fit guidance. If the chart looks copied from a generic clothing template, expect more returns.
Equestrian-specific suppliers tend to account for things general brands miss: longer shirt hems that stay tucked, knee patch placement for saddle contact, and fabrics that resist horsehair and hay. A general sportswear brand may look fine off the horse but often fails in the saddle. That said, some crossover brands have improved, so check for riding-specific design details rather than the label alone.
For helmets, look for certification stickers from recognized bodies and a secure harness that doesn't loosen during movement. For body protectors, the fit should stay close to the torso without restricting arm lift. Riding boots need a heel of about one inch and a sole that grips stirrups without being too sticky. High-visibility panels on jackets are a plus for road riding or low light.
A good supplier will explain the difference between a lightweight mesh for summer and a softshell with a fleece backing for winter. They should mention breathability ratings or at least describe how the fabric performs in humidity. Avoid suppliers that only say 'all-season'—that usually means it works well in none.
Ask whether the gear can be machine washed or needs hand washing, and if technical fabrics lose their water resistance after cleaning. Check if helmets have replaceable liners, and whether boots require specific conditioners. A supplier that gives clear care instructions is signaling that their products are meant to be kept long-term.
Not always. Some premium pricing covers branding and marketing more than materials. Compare the actual specs—denier of fabric, type of leather, stitch count per inch—rather than the price tag. Mid-range suppliers often match top-tier performance if they focus on fewer product lines and direct sales.
Conclusion
Quality riding gear isn’t about looking polished in the arena—it’s about how well each piece performs when you’re actually in the saddle. Breeches that stretch and recover with your leg position eliminate the tugging and pinching that distract from your aids, while trail-tested fabrics need to survive brush, sweat, and repeated washings without losing their shape. If you’re finishing every ride sore, the problem often isn’t your saddle; it’s the flat, unforgiving seams or lack of padding in your riding tights, which turn a two-hour hack into a test of endurance. A supplier worth trusting will focus on those details instead of just stitching a logo on the waistband.
Comfort also comes down to how you layer and how your gear fits in motion. Early morning rides call for insulation that traps heat without adding bulk, so you can swing a leg over without feeling like you’re wrapped in a duvet. A helmet that sits a fraction too low or too loose is easy to fix—small adjustments to the dial or chin strap take less than a minute but change how secure you feel at a canter. And don’t overlook your boots: soles with a tread pattern designed to grip the stirrup, not clog with mud, keep your foot stable when you need to post or brace. Together, these choices separate generic riding apparel from gear that genuinely works for every rider.
Contact Us
Contact Person: Keven Tong
Email: [email protected]
Tel/WhatsApp: +86 18666477707
Website: https://www.ope-technology.com