

How Do You Install a Fish Finder Mounting Bracket Without Drilling Into the Hull
2026-07-10
For countless anglers, the thought of drilling holes into their boat’s hull is enough to cause genuine anxiety. One wrong measurement, a hidden wire, or a hairline crack can turn a simple electronics upgrade into an expensive repair. The good news is that you can securely mount your display and transducer using a Fish Finder Mounting Bracket without a single drill bit touching your fiberglass, aluminum, or plastic hull. Marine offers a complete range of no-drill solutions that preserve your boat’s integrity while delivering rock-solid performance on the water.
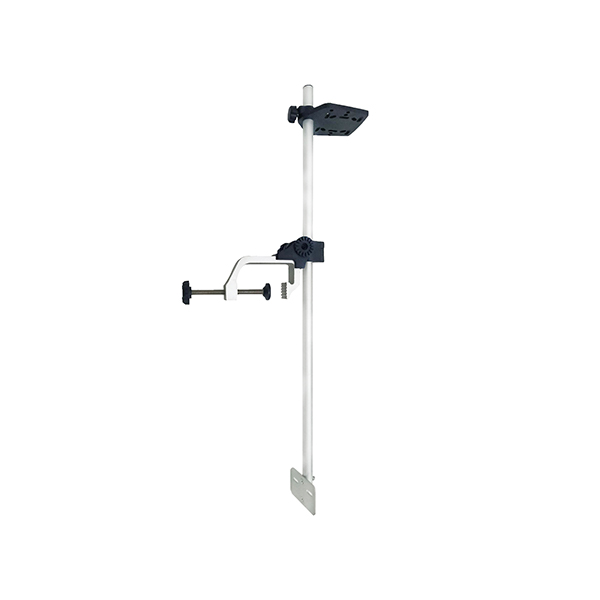
Why Choose a No-Drill Installation?
Traditional through-hull or transom mounts require permanent holes that can lead to water intrusion, wood core rot, and decreased resale value. A no-drill approach uses existing hardware, clamping systems, or heavy-duty adhesives to attach your Fish Finder Mounting Bracket. This method is faster, reversible, and equally reliable when done correctly. Whether you own a kayak, a bass boat, or a pontoon, Marine has engineered brackets that leverage your boat’s existing rail systems, trolling motor shafts, or transom edges without modification.
Step-by-Step Installation Guide (No Drill Required)
Follow this professional workflow to install your Fish Finder Mounting Bracket safely and efficiently.
| Step | Action | Pro Tip |
|---|---|---|
| 1 | Choose the right bracket type – Select a clamp-on, suction, or adhesive-backed Fish Finder Mounting Bracket from Marine based on your hull material. | For fiberglass, use a clamp-on bracket. For plastic kayaks, use a track-mount adapter. |
| 2 | Clean the mounting surface – Degrease the area with isopropyl alcohol. Remove all wax, dirt, and old sealant. | A clean surface ensures clamp grip and adhesive bond strength. |
| 3 | Attach the bracket to existing hardware – Secure the bracket to your trolling motor shaft, jack plate, or stern rail using the included stainless steel bolts. | Do not overtighten – use a torque wrench to avoid stripping threads. |
| 4 | Mount the transducer to the bracket – Slide the transducer into the pivot hinge and lock it with the thumb screw. Ensure the transducer sits parallel to the waterline. | Use a level app on your phone for precise alignment. |
| 5 | Route the cable safely – Run the transducer cable along the motor cable or rail using zip ties. Leave a drip loop before entering the hull. | A drip loop prevents water from traveling along the cable into your boat. |
| 6 | Test for stability – Shake the bracket firmly. If using an adhesive base, wait 24 hours for full cure before on-water use. | Marine adhesive brackets support up to 15 lbs of dynamic load. |
Critical Adjustments for Different Hull Types
| Hull Material | Recommended Marine Bracket | Mounting Point | Cure/Clamp Time |
|---|---|---|---|
| Fiberglass | Clamp-on transom bracket | Transom edge | Instant clamp |
| Aluminum | Track-mount sliding bracket | Gunwale track | 5-minute install |
| Plastic / Kayak | Adhesive pad with pivot arm | Flat deck area | 24-hour cure |
| Inflatable | Suction cup with locking lever | Smooth transom panel | Instant suction |
Professional note: Always check your transducer’s beam angle. A Fish Finder Mounting Bracket that positions the transducer too deep or too shallow will degrade sonar returns. Marine brackets feature micro-adjustment knobs that allow 15° of tilt correction without tools.
3 Essential FAQ About Fish Finder Mounting Brackets
Q1: Can a clamp-on Fish Finder Mounting Bracket damage my transom paint or gel coat?
A1: Not if you use a bracket with rubberized clamp pads. Marine equips all clamp-on Fish Finder Mounting Brackets with EPDM rubber inserts that distribute pressure evenly and prevent scratching. For added protection, apply a thin layer of marine-grade masking tape under the clamp jaws. Never use a bare metal clamp on painted surfaces – the vibration from outboard motors will abrade the finish within hours. Always tighten clamps to the manufacturer’s specified torque (usually 8–10 Nm) to avoid over-compression, which can cause gel coat crazing.
Q2: How do I ensure my transducer stays at the correct depth with a no-drill bracket?
A2: The ideal transducer position places the bottom of the element 3–8 mm below the hull’s bottom edge when the boat is stationary. With a Marine adjustable Fish Finder Mounting Bracket, you can set this height using the vertical slide channel. Launch your boat, idle at 3–5 mph, and watch the sonar screen. If you lose bottom reading, raise the bracket by 2 mm increments using the supplied spacers. For stepped hulls, mount the transducer on the lowest step to maintain water flow. Never mount the transducer behind strakes or rivets – these create turbulence that introduces air bubbles, rendering your fish finder useless at planning speeds.
Q3: Can I switch my Fish Finder Mounting Bracket between two boats without re-drilling?
A3: Absolutely – and this is where Marine no-drill systems excel. The quick-release plate system allows you to leave a base plate clamped or adhered to each boat, then snap your display and transducer arm between them in under 10 seconds. Each base plate uses the same keyed slot pattern, so you only need one Fish Finder Mounting Bracket kit for multiple vessels. When transferring, always re-apply dielectric grease to the cable connectors and check that the locking lever clicks audibly into place. For kayak-to-bass-boat transfers, recalibrate the tilt angle because each hull has a different deadrise.
Maintenance and Performance Checks
After every three outings, inspect your Fish Finder Mounting Bracket for:
-
Corrosion on hinge pins (rinse with fresh water after saltwater use)
-
Worn rubber pads (replace annually)
-
Loose thumbscrews (apply a drop of blue threadlocker)
Marine brackets are built with 316-grade stainless steel and anodized aluminum, offering 5× the corrosion resistance of standard zinc-plated brackets.
Final Verdict
Installing a Fish Finder Mounting Bracket without drilling is not only possible – it is often superior to permanent mounts for versatility, resale value, and ease of maintenance. By selecting the correct clamp, track, or adhesive system from Marine, following the step-by-step table above, and tuning the transducer height with precision, you will achieve factory-grade sonar performance with zero structural compromise. The peace of mind alone makes the no-drill approach the smartest choice for modern anglers.
Ready to secure your fish finder the right way? Browse the full Marine collection of no-drill Fish Finder Mounting Brackets today. Have a unique hull shape? Our technical team can recommend the exact bracket model for your boat within one business day. Contact us now for a free compatibility consultation – we will help you mount it right, the first time, without a single hole.